TL;DR
Moving your rig into another room or closet can drastically reduce noise and reflections. The real key is proper placement, ventilation, and targeted acoustic treatment—foam alone won’t cut it. A well-ventilated closet with careful mic and panel positioning makes a quiet, professional-sounding space.
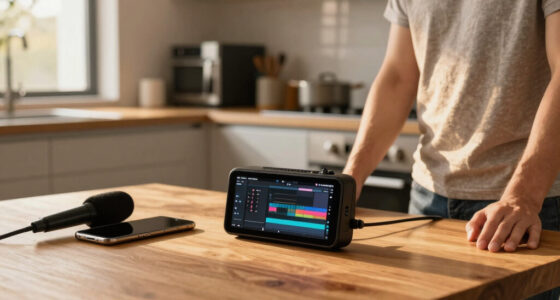
Imagine this: your high-powered AI rig hums loudly, echoing off the small, hard surfaces of your closet. You want a quiet space to record, stream, or just work without noise pollution. The truth? The best way to tame that noise isn’t just slapping foam on the walls. It’s about where you place the rig and how you handle ventilation.
This article cuts through the noise myths and shows you how to turn a tiny closet into a focused, quiet studio. Whether you’re recording vocals, streaming, or just want a cleaner sound, I’ll share practical tips that work — no fancy construction needed.
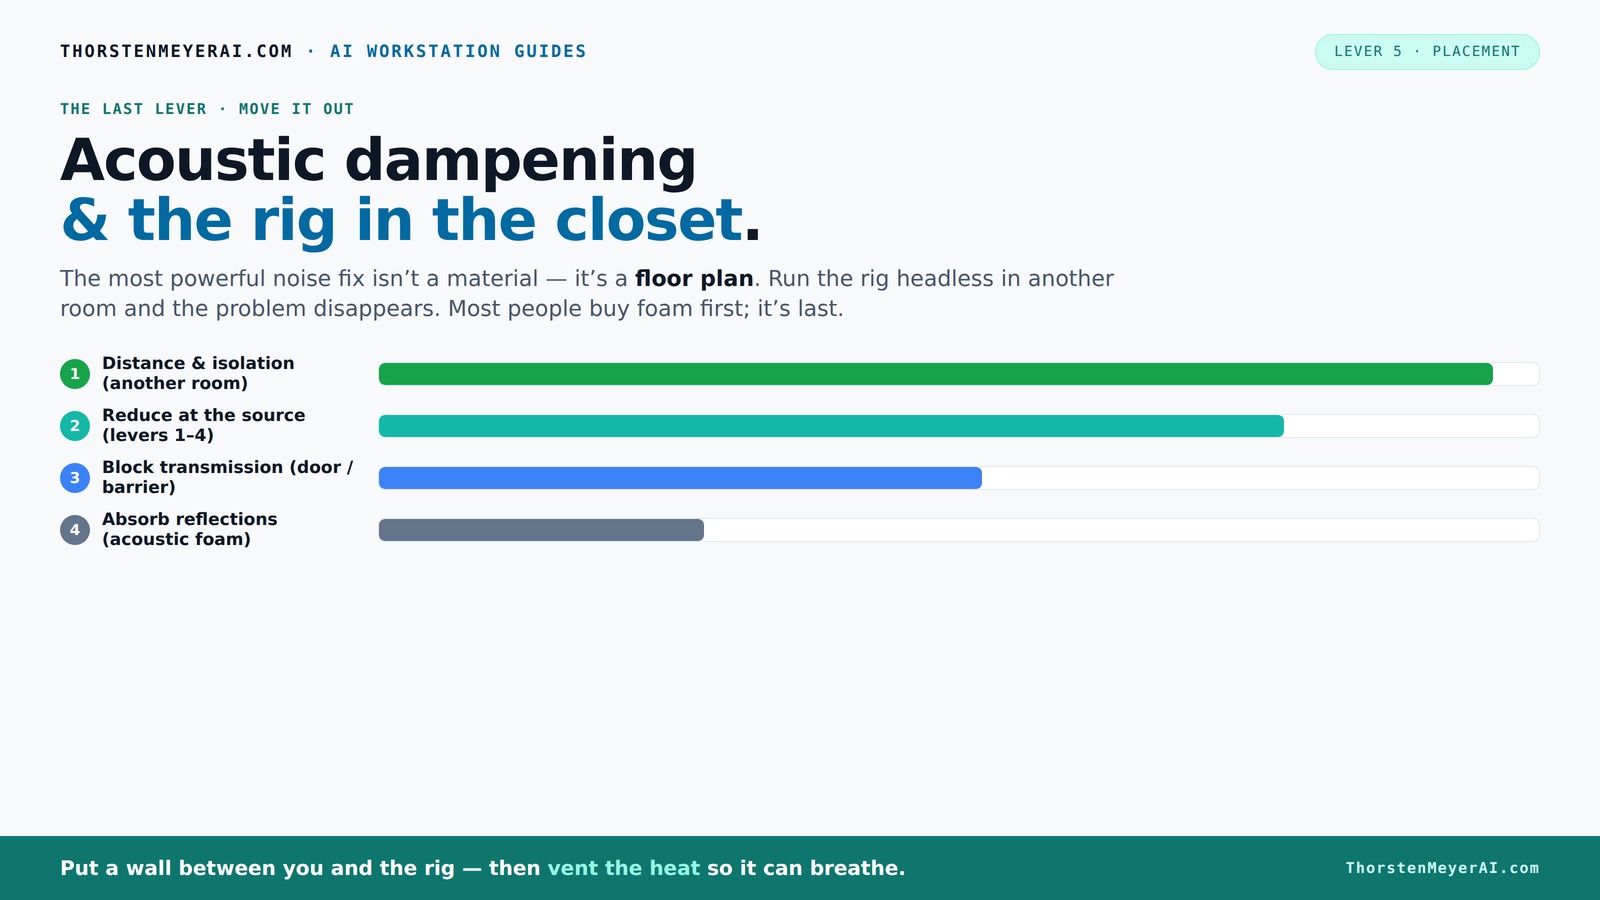
Acoustic dampening
& the rig in the closet.
The most powerful noise fix isn’t a material — it’s a floor plan. A rig you can’t hear because it’s in another room beats any amount of foam. Tap the approaches in Part 1 to see what actually works.
(another room)
(levers 1–4)
(door / barrier)
(acoustic foam)
Contain the noise, not the heat
Key Takeaways
- Distance is the most effective noise reducer — put your rig in another room if possible.
- Ventilation is critical—sealed closets trap heat, risking damage and noise from throttling fans.
- Targeted acoustic treatment at reflection points makes tiny spaces sound clearer, not just foam everywhere.
- Seal door gaps and treat floors with rugs or foam to cut back on echoes and leakage.
- Test your setup with simple recordings to spot reflections and leaks, then adjust accordingly.
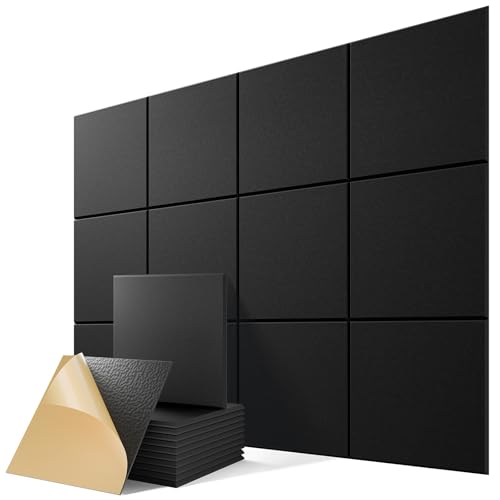
12 Pack Self-Adhesive Acoustic Panels, 12" X 12" X 0.4" High-Density Polyester Sound Proof Foam Panels for Walls, Soundproof Wall Panels for Home & Office (Black)
Superior Noise Reduction & Echo Cancellation - Tired of background noise and poor acoustics? Our soundproof wall panels...
As an affiliate, we earn on qualifying purchases.
As an affiliate, we earn on qualifying purchases.
Why Your First Move Should Be Moving It (Yes, Really)
Placing your rig in another room beats any foam or paneling. Distance is the biggest factor in noise reduction. When your GPU and CPU are far away, the sound doesn’t bother you — simple as that. Think of it like a loud neighbor: the farther away, the quieter they are. Learn more about decluttering and organizing your space.
For example, I set up my AI workstation in a basement closet. I stream from my laptop in the living room. The noise from the rig? Nonexistent on my mic. All I need is a strong network connection. This setup is a game-changer for noise-sensitive work.
Plus, your network’s speed and ventilation become the new top priorities. You don’t need the rig next to you; you need reliable Wi-Fi and good airflow.

8 Pack - Bass Traps Acoustic Foam Corner, 8''x8''x12'' Black Bass Traps Corner Studio Foam, High Density and Fire-Proof Acoustic Panels Recording Studio Acoustical Treatments
Acoustic Principle- Bass Trap is a kind of sound absorbing structure specially used to absorb specific low-frequency standing...
As an affiliate, we earn on qualifying purchases.
As an affiliate, we earn on qualifying purchases.
The 'Rig in the Closet' Setup — The Good and the Caveat
Putting your rig in a closet or sealed cabinet can isolate noise impressively. But here’s the catch: heat. A GPU working 24/7 dumps hundreds of watts. Seal it in and watch the temperature climb. That’s a recipe for throttling and loud fans.
To avoid cooking your gear, you must provide airflow. Think of it like a car engine: it needs a way to breathe. Use vents, exhaust fans, or even a DIY duct system. For example, I installed a quiet exhaust fan in my closet setup, which keeps the temperature stable while muffleing noise. Learn about acoustic dampening and setup.
Want a more elegant solution? Consider a purpose-built soundproof cabinet with temperature controls and ducting. It’s an investment, but it keeps your rig cool and quiet.
Understanding this tradeoff is vital: while sealing the rig can greatly reduce noise, neglecting heat management can lead to hardware throttling, which reduces performance and can cause long-term damage. Therefore, balancing noise isolation with efficient cooling is key to a sustainable setup.

Aokeo Microphone Isolation Shield, Foldable Mic Shield with Triple Sound Insulation, Reflection Filter with 3/8" and 5/8" Mic Threaded Mount for Recording Studio, Podcasts, Singing, and Broadcasting
The Microphone Isolation Shield features a sound-proof foam front and a ventilated metal back panel to eliminate noise...
As an affiliate, we earn on qualifying purchases.
As an affiliate, we earn on qualifying purchases.
How to Position Your Microphone and Panels for the Best Sound
Acoustic dampening isn’t just about slapping foam everywhere. It’s about where you put it. In a closet, the main goal is to control early reflections and standing waves. Place your mic facing a treated wall—usually the wall opposite the door—so sound doesn’t bounce straight back.
For example, if you record vocals, position your mic about 6-12 inches from the wall that’s behind you. Treat that wall with absorption panels, especially at reflection points. Use a mirror trick: sit in front of your mic, and have a friend move a small mirror around. Wherever you see the mic’s reflection in the mirror, add absorption there.
In small spaces, sound waves bounce quickly between surfaces, creating echoes and standing waves that color your recordings. Proper placement of panels helps absorb these reflections at their source, leading to clearer recordings. Misplaced or insufficient treatment can leave you with muddiness or harshness that’s difficult to fix later. The goal is to tame these reflections early, so your microphone captures a cleaner, more natural sound. See tips on acoustic treatment placement.
Deeply understanding why placement matters is crucial: reflections are the primary source of coloration and muddiness in recordings. If untreated, these reflections cause phase issues and frequency buildup, leading to a harsh or boxy sound. Strategically placing panels at reflection points—especially at the microphone’s head height—can drastically improve clarity. This targeted approach minimizes the need for extensive EQ corrections later, saving time and preserving audio quality.

Sound Addicted - Studio Monitor Isolation Pads suitable for 6.5, 7 and 8 Inches Large Speakers | Reduce Vibrations and Fits most Stands - Pair | SMPad 8
SMPad 8 is made out of the highest quality acoustical foam (50kg/m^3 density).
As an affiliate, we earn on qualifying purchases.
As an affiliate, we earn on qualifying purchases.
Sealing the Door and Managing Gaps for Quiet
Gaps around the door are a common weak point. Sound leaks through even tiny cracks. Seal them with weatherstripping or acoustic sealant. For a quick fix, hang a blanket or thick curtain over the door—this reduces reflections and noise transmission. Learn about sealing gaps for better soundproofing.
In my own closet studio, sealing the door with weatherstripping cut noise by over 40%. Every gap matters. Use a draft stopper or a weighted blanket if needed. Think of it like sealing your house before a storm—every crack closed helps.
Beyond sealing, understanding the importance of these gaps is crucial: even small leaks can significantly undermine your efforts at sound isolation. Proper sealing ensures that external noise and internal reflections are minimized, creating a more controlled environment for recording. This step often offers the highest return for minimal investment, especially in small spaces where every decibel counts.
Deeply consider that even tiny gaps can act like antennas for sound, allowing external noise to intrude and reflections to escape. Properly sealing these gaps effectively traps internal sound waves, ensuring your recordings are cleaner and external noise is kept out. The tradeoff is that over-sealing without ventilation can lead to heat buildup, so balance is key.
How to Treat the Floor and Keep It Quiet
Hard floors reflect sound, creating echo and harshness. A simple rug or carpet can absorb reflections and footstep noise. For example, I placed a thick rug beneath my desk, which softened the sound and made my voice clearer. Find tips on treating floors for better acoustics.
If your closet has a hard concrete floor, adding foam mats or a large rug makes a noticeable difference. It’s a cheap fix that improves clarity and reduces low-frequency muddiness.
In small rooms, the floor acts as a major reflector, especially at mid and high frequencies. Insufficient treatment here can cause your recordings to sound boxy or boomy. Using absorptive materials on the floor breaks up these reflections, leading to a more natural sound. It’s important to understand that untreated floors can significantly color your recordings, making them sound unnatural or overly reverberant. By placing a rug or foam on the floor, you’re effectively reducing these problematic reflections at their source. The tradeoff is that overly thick or dense rugs can deaden the room excessively, so it’s about finding a balance that reduces harshness without making the space sound dead or dull.
Ventilation and Heat Management — Keep It Cool
Proper airflow is non-negotiable. A sealed closet traps heat, risking hardware damage. Use passive vents, exhaust fans, or ducted airflow to keep temperatures in check. For example, I installed a quiet exhaust fan with a thermostat, which kicks in only when needed, keeping my rig cool and silent.
To prevent overheating, consider liquid cooling or a radiator setup that exports heat outside the closet. This setup is especially useful if you’re running high loads continuously.
Ignoring proper ventilation can lead to hardware throttling, increased noise from fans trying to cool overheated components, and potential hardware failure. Think of your closet like a tiny data center: it needs a steady breeze. Investing in a good cooling system not only prolongs your hardware’s lifespan but also maintains optimal performance, ensuring your recording environment stays consistent and quiet.
Deeply understanding the importance of ventilation reveals that heat is one of the biggest hidden threats in small, enclosed spaces. Without proper cooling, you risk not only hardware throttling—where fans run at maximum speed to cool down—but also potential permanent damage. A well-ventilated space ensures consistent performance, quieter operation, and longer hardware lifespan. The tradeoff here involves balancing noise from cooling fans and the complexity of ducting solutions, but investing in good airflow management pays off in reliability and sound quality.
Putting It All Together: The Perfect Closet Studio Setup
Start with placement — put your rig in a different room if possible. If not, ensure it’s in a well-ventilated, sealed space with airflow. Treat the reflection points around your mic—face the mic toward a treated wall, and cover other reflective surfaces with foam or blankets.
Seal the door gaps, add a rug, and install a quiet exhaust fan. Use foam panels strategically—more coverage beats perfect symmetry in small booths. Test by recording claps or speaking loudly; listen for echoes or leaks. Adjust as needed.
Remember: the goal isn’t perfect soundproofing but reducing reflections, echo, and noise enough to do your work comfortably. It’s about smart choices, not endless spending.
Frequently Asked Questions
How do I make a closet quieter without expensive construction?
Focus on sealing gaps around the door, adding rugs or blankets to absorb reflections, and placing acoustic panels at reflection points. Moving your rig to a different room is the most effective step, but these tweaks help significantly without breaking the bank.
What is the difference between soundproofing and acoustic treatment?
Soundproofing blocks sound from entering or leaving a space—think barriers and sealing gaps. Acoustic treatment, on the other hand, reduces echo and reflections inside the room by absorbing or diffusing sound waves. Both are important, but they serve different purposes.
Where should I put foam or acoustic panels in a closet booth?
Place panels at reflection points—mainly behind the mic, on side walls, and on the ceiling. Use the mirror trick: position panels where your mic's reflection is visible. Covering these spots reduces echo and harshness, especially in small, reflective spaces.
Do I need bass traps in a small closet studio?
Generally, bass traps are secondary in tiny booths. If you notice low-end buildup or a boomy sound, adding bass traps in corners can help. For most small closets, focusing on absorption at reflection points offers enough control.
How thick should the panels be?
For small spaces, 2-inch panels are usually enough for mid and high frequencies. Thicker panels (4 inches) better absorb lower frequencies, which can be a problem in tight rooms. Balance your budget and needs accordingly.
Conclusion
Turning a closet into a quiet, effective studio isn’t about buying endless foam panels. It’s about placement, ventilation, and strategic treatment. Think of your closet as a tiny control room—focused, cool, and well-placed.
Remember, the real magic happens when you treat the space intelligently and prioritize airflow. Your recordings will sound clearer, your hardware happier, and your workspace calmer. Now, go set up your perfect closet studio—quiet, cool, and ready for action.