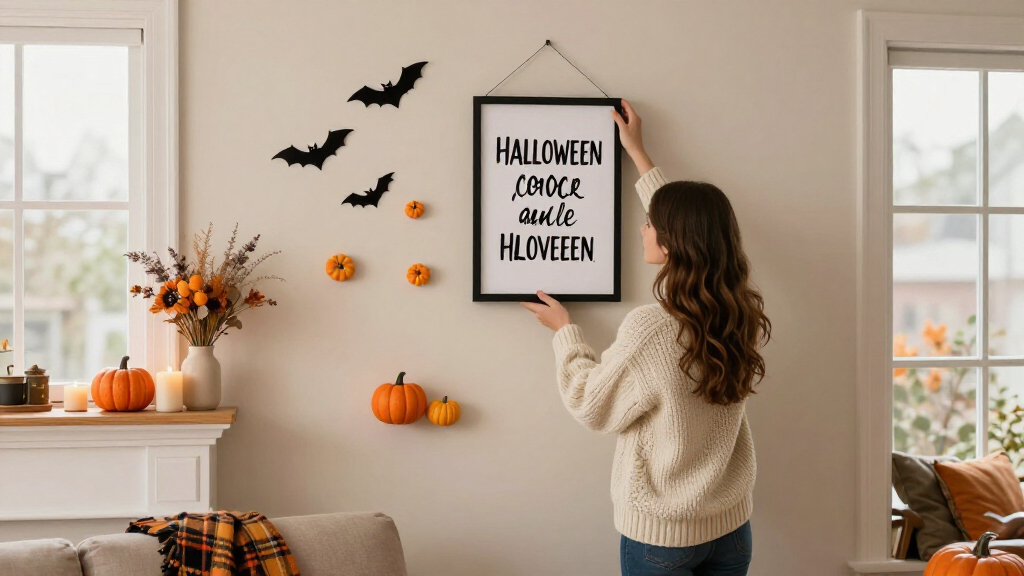

This guide shows you how to create spooky Halloween quote decor — a sign, banner, or wall display featuring a creepy phrase like “Enter if You Dare,” “Something Wicked This Way Comes,” or “Beware: Witch Parking Only.” You will finish with a finished piece you can hang indoors or in a covered outdoor spot, built from affordable craft materials and basic tools.

Customized Halloween Art Poster from Photo, Personalized Canvas Wall Art, 12"L x 18"W, Unframed
- ✔ Size: 12"L x 18"W
- ✔ Material: Canvas
- ✔ Frame Type: Unframed

Custom Witchy Halloween Art Poster Made from Your Picture
- ✔ Size: 12"L x 18"W
- ✔ Material: Canvas
- ✔ Frame Type: Unframed

Please Don’t Summon Demons Halloween Wooden Box Sign
- ✔ Brand: Krollma
- ✔ Material: Wood
- ✔ Dimensions: 5 x 5 x 0.3 inches
This guide is written for beginners. No drawing skill is required — every lettering method here uses a printed template or pre-made letters. The most time-consuming part is letter placement and paint drying, so plan for one to three hours of active work plus a few hours of drying time if you paint your background.
You will choose one of three lettering methods based on the tools you have: adhesive craft-store letters (fastest), a printed-and-glued paper sign (cheapest), or hand-painted lettering using a stencil template (most polished result). The steps below walk you through planning, building the background, applying the lettering, and finishing the piece for display.
Difficulty: Beginner | Time: 1-3 hours (plus drying time)
What You’ll Need
Tools & Materials:
- Scissors and a craft knife or utility knife
- Pencil and ruler
- Paintbrush (1-inch flat brush for backgrounds, small detail brush for touch-ups)
- Glue stick, mod podge, or hot glue gun (depending on lettering method)
- Hole punch or drill (for hanging with ribbon or twine)
- Printer and paper (for the template method)
- Sandpaper, 120-150 grit (optional, for distressed edges)
Knowledge:
- Basic measuring and marking with a ruler
- Comfortable using scissors or a craft knife safely
- Basic brush painting technique (brush strokes in one direction, thin coats)
Gather everything before starting. If you plan to paint, set up a covered work surface in a ventilated area. Choose your lettering method first, because it determines which materials you need: Method A uses pre-made adhesive or chipboard letters, Method B uses a printed sign you glue to a board, and Method C uses a stencil template and paint. All three share the same background and finishing steps.
Customized Halloween Art Poster from Photo, Personalized Canvas Wall Art, 12"L x 18"W, Unframed
Among the three options here, this personalized canvas poster offers the most convincing answer to the question what makes spooky Halloween quote decor actually memorable — the fact that nobody else owns it. Because it’s generated from your own photo, the final piece carries a personal narrative that the Please Don’t Summon Demons box sign, however charming, simply cannot replicate. The 12-by-18-inch landscape format is large enough to anchor a gallery wall or hallway display without overwhelming a smaller room.On construction, this option stands out for its fade-resistant inks and textured canvas stretched over a reinforced wooden frame, arriving ready to hang out of the box — a real advantage if you’d rather skip a framing errand mid-season. The style flexibility matters too: it plays nicely with boho, modern minimalist, and vintage farmhouse interiors, which makes it easier to integrate into an existing scheme. Compared with the Witchy variant below, this version is the safer all-purpose choice when you want broader thematic freedom rather than a specifically witchy aesthetic.The honest tradeoffs: the brand is generic with a limited reputation, so you’re accepting some uncertainty about photo-editing consistency, and the unframed presentation won’t appeal to buyers who prefer a bordered, framed gallery look. The print quality also depends heavily on the photo you supply — a low-resolution snapshot will undermine the whole concept. Still, for buyers who want a statement piece with wall presence and personal meaning, this pick makes the most sense.
Pros:
- Fully personalized from your own photo for a one-of-a-kind piece
- Fade-resistant inks and durable textured canvas
- Ready to hang with reinforced wooden stretcher frame
- Blends with boho, minimalist, and farmhouse decor styles
Cons:
- Generic brand with limited reputation for consistent customization
- Unframed look may not suit all wall setups
- Final quality depends heavily on the photo you provide
Best for: Buyers who want a large, personalized Halloween wall statement and have a high-quality photo to work from
Not ideal for: Anyone wanting a framed, gallery-style finish or decor that requires zero input beyond unboxing
Bottom line: The strongest overall pick for spooky Halloween quote decor because personalization plus wall-scale presence delivers impact no off-the-shelf sign can match.
“The strongest overall pick for spooky Halloween quote decor because personalization plus wall-scale presence delivers impact no off-the-shelf sign can match.”
Custom Witchy Halloween Art Poster Made from Your Picture
This second canvas option shares its sibling’s DNA — same 12-by-18 dimensions, same fade-resistant inks, same gallery-grade stretched finish — but it differentiates itself through a deliberately witchy, gothic design direction. If your Halloween decor leans toward moons, potions, and dark-academia energy rather than general spookiness, this version speaks your language more fluently than the general-purpose poster above. We’d call it the best choice for themed rooms where the witchy aesthetic is the organizing principle.Compared with the box sign, the advantage is scale and customization: you get a wall-worthy print built from your own picture, not a 5-inch novelty. Compared with the first canvas, the neutral color family actually works in its favor for moody palettes, pairing easily with dark walls, candlelight, and vintage farmhouse textures. The careful packing for shipping is a thoughtful touch that reduces the risk of a creased or dented canvas arriving mid-decorating season.Where it loses points is clarity: the listing describes an unframed print stretched over a wooden frame, which is a genuinely confusing combination for buyers, and the 3.04-ounce weight suggests a thinner canvas than premium alternatives. Like its sibling, it comes from a generic brand with no established reputation. This model is better suited to buyers who prioritize the witchy theme and accept some material ambiguity, rather than shoppers who want maximum certainty about build quality.
Pros:
- Witchy gothic styling tailored to themed Halloween rooms
- Fade-resistant inks for long-lasting seasonal color
- Ready to hang on a reinforced wooden stretcher frame
- Carefully packed for safe shipping
Cons:
- Confusing listing: unframed designation despite stretched-canvas description
- Generic brand with no established reputation
- Lightweight build may indicate thin canvas material
Best for: Buyers decorating a witchy, gothic, or dark-academia themed space who want custom-photo wall art
Not ideal for: Shoppers who need precise clarity on framing and canvas thickness before buying
Bottom line: The go-to pick when the witchy aesthetic is non-negotiable, provided you’re comfortable with a thinner canvas and some listing ambiguity.
“The go-to pick when the witchy aesthetic is non-negotiable, provided you’re comfortable with a thinner canvas and some listing ambiguity.”
Please Don’t Summon Demons Halloween Wooden Box Sign
Sometimes the spookiest quote decor is the funniest one, and this 5-by-5 wooden box sign from Krollma earns its place by doing something neither canvas can: working anywhere in the house without a wall, a nail, or a photo upload. The Please Don’t Summon Demons message in rustic gothic styling lands as a joke guests actually notice, which makes it a natural fit for bathroom counters — a room most Halloween decor ignores entirely — plus shelves, desks, and office spaces.In contrast to both custom canvases, this is the only pick from a named brand, and the build reflects it: burr-free, sturdy wood with a natural rustic finish that feels intentional rather than mass-produced flimsy. There’s no personalization workflow, no waiting on a custom print, and no dependence on your photography skills — it’s genuinely zero-effort decorating. As a gift, it’s also the safest bet of the three, since you don’t need to know anything about the recipient’s photos or wall space.The limitations are structural, not qualitative. At 5 inches square, it won’t anchor a large display — pair it with taller candlesticks or a wreath if you want it noticed in a big room — and its appeal is tightly bound to the Halloween season. If you’re choosing between this and the canvases, the real question is simple: do you want a personal statement on the wall, or a witty accent on a surface? For the latter, nothing here beats it.
Pros:
- Compact 5×5 size fits shelves, counters, and desks anywhere
- Sturdy, burr-free wood with a rustic natural finish
- Zero setup — no hanging, framing, or photo upload required
- Fun, giftable novelty with broad appeal
Cons:
- Very small footprint gets lost in large displays
- Seasonal appeal limited almost entirely to Halloween
- Tabletop-only design offers no wall-decor value
Best for: Buyers decorating shelves, bathrooms, and desks, or looking for an easy, giftable Halloween novelty
Not ideal for: Anyone decorating a large wall or wanting a primary statement piece
Bottom line: The easiest and funniest way to add spooky quote decor to small spaces, as long as you accept its tabletop-only, season-specific nature.
“The easiest and funniest way to add spooky quote decor to small spaces, as long as you accept its tabletop-only, season-specific nature.”
As an Amazon Associate we earn from qualifying purchases.
Before You Start
Choose your quote before you buy anything. Short quotes (3-6 words) are dramatically easier to lay out than long ones. If this is your first quote project, pick something under 25 characters, such as “Beware” or “Witch Way” or “Enter If You Dare.” Long quotes require smaller letters, more precise spacing, and more patience.
Measure your display location first. Know whether the piece will hang on a door, a wall, a mantel, or a porch, and measure that space. A common beginner mistake is building a sign that is too wide or too tall for where it needs to hang. Write down your maximum width and height and keep it in front of you while you work.
Safety note: If you use a craft knife, cut on a self-healing mat or scrap cardboard and always cut away from your body. If you use a hot glue gun, keep a bowl of cold water nearby for accidental contact with hot glue, and work on a heat-safe surface.
Step-by-Step Instructions
Step 1: Choose your quote and lettering method
Write down your quote and count the characters, including spaces. Then pick your lettering method based on what you have on hand:
- Method A — Pre-made letters: Buy adhesive vinyl or chipboard letters from a craft store or dollar store. This is the fastest option and requires no cutting.
- Method B — Printed sign: Design your quote in any word processor or free design app, print it at home or at a print shop, and glue it to a board. This gives you full control over fonts and costs almost nothing.
- Method C — Painted stencil: Print your quote as a template, trace or transfer it onto your board, and fill in with paint. This produces the most durable, polished result.
Write your chosen method at the top of your workspace notes so you follow the correct steps later.
Tip: For Method B, check your printer’s maximum paper size before designing. Standard home printers handle 8.5 x 11 inches; anything larger requires a print shop visit or taping multiple pages together.
Check: You have a specific quote written down, a character count, and a chosen method with the needed materials on your work surface.
Step 2: Build and prep your background board
Cut or select your board to fit your measured display space. Popular beginner-friendly bases include scrap wood planks, a canvas panel, thick cardboard, or an old picture frame backing. Sand any rough edges with 120-150 grit sandpaper and wipe away dust with a dry cloth.
Paint the background in 1-2 thin coats of your base color. Classic spooky palettes are black with white or orange lettering, dark gray with purple, or stained wood with black lettering. Let the first coat dry for 30 minutes before applying a second. Allow the final coat to dry fully — at least 2 hours — before handling.
Tip: Thin coats prevent drips and brush marks. If you want a weathered look, lightly sand the dried paint at the edges and corners after it cures, letting some wood show through.
Check: The board is fully dry, smooth to the touch, and no paint transfers to your fingers when you press on it.
Step 3: Create or position your lettering template
For Method A, lay your purchased letters out on the board without removing adhesive backing. Arrange them first, commit second.
For Method B, type your quote in a bold font at a size that fills your paper width, print it, and trim the paper to fit your board with a small border on all sides.
For Method C, print your quote at full size, then shade the back of the paper heavily with pencil graphite. Tape the paper face-up on your board and trace over each letter with a firm pencil — the pressure transfers a graphite outline onto the board. Remove the paper to reveal your traced letters.
For all methods, use a ruler to find the horizontal center of your board and mark it lightly in pencil. Center your first line of text on that mark, then space remaining lines evenly above and below.
Tip: Use a level or measure from both edges to confirm your text lines are straight — eyeballing is the single most common cause of crooked results.
Check: Your letters or template sit centered and level on the board, with even margins on the left and right sides.
Step 4: Apply the lettering permanently
Method A: Peel the adhesive backing one letter at a time, starting from the center of the line and working outward. Press each letter firmly for 10 seconds. If your letters are chipboard without adhesive, attach them with hot glue applied to the back in a thin bead.
Method B: Apply glue stick or mod podge evenly across the back of your printed sign, position it on the board starting from one edge, and smooth it down with a ruler or old credit card to push out air bubbles. Brush a thin layer of mod podge over the top to seal it.
Method C: Fill in your traced letters with paint using a small detail brush. Use short, deliberate strokes and stay just inside your traced lines. Let dry for one hour, then apply a second coat if the background shows through.
Tip: For Method C, wipe excess paint off the brush before starting each stroke. A nearly-dry brush gives sharper edges than a loaded one.
Check: All letters are fully attached with no lifting edges, and paint (if used) is dry with crisp edges and no bleed outside the traced lines.
Step 5: Add finishing touches and weathering
Optionally, add decorative elements around your quote: spider web cutouts in the corners, painted dripping wax or blood drips from the top edge, small hand-drawn bats, or a border of painted dots. Keep decorations in the corners and edges so the quote remains the focal point.
For a distressed look, lightly sand over dried lettering and edges with fine sandpaper, then wipe clean. Seal the entire piece with a coat of clear acrylic sealer or mod podge, especially if it will be displayed outdoors or in humidity.
Tip: Dripping effects are easy: paint a thick line along the top edge, then drag small amounts downward in short vertical strokes of varying lengths before the paint dries.
Check: Decorations complement rather than crowd the quote, and the sealed surface is dry and smooth.
Step 6: Add hanging hardware and display the piece
Choose a hanging method: punch or drill two holes near the top corners and thread ribbon, twine, or wire through them, or attach a sawtooth hanger to the back with small nails or strong adhesive. For mantel or shelf display, attach a small easel back or simply lean the board against a stable surface.
Hang the piece at eye level in your chosen location. Step back five feet and check that it reads clearly and sits level. Adjust the hanging point until it looks straight.
Tip: For outdoor display on a covered porch, use ribbon or wire rather than paper attachments, and bring the piece inside during rain regardless of sealing.
Check: The decor hangs level, the quote is readable from across the room, and the piece feels secure when lightly tugged.
Common Mistakes to Avoid
- Choosing a quote that is too long for the board size — Stick to 3-6 words for your first project, and always print or arrange a test layout on paper at actual size before committing to the board.
- Applying letters or paint before the background is fully dry — Wait at least two hours after the final background coat. Press-test an inconspicuous corner with your finger — if any tackiness remains, wait longer.
- Eyeballing letter placement instead of measuring — Mark the centerline and each text baseline in light pencil before positioning anything. Erased pencil marks disappear; crooked letters do not.
- Using paper or cardboard materials in unprotected outdoor locations — Use wood or sealed foam board for porch displays, keep decor under cover, and bring pieces inside before storms.
Troubleshooting
Problem: Painted letters bleed outside the traced lines
Solution: Let the lettering dry completely, then carefully paint over the bleed with your background color using the small detail brush. Work in short strokes and let each repair dry before adding a second pass.
Problem: Printed sign has air bubbles under the paper
Solution: Lift the nearest edge gently while the glue is still wet and smooth from the opposite side with a ruler. If the glue has dried, prick the bubble with a pin, press flat, and seal over the top with mod podge.
Problem: Adhesive letters peel at the edges over time
Solution: Secure lifting edges with a tiny dot of hot glue or clear craft glue applied with a toothpick, then press and hold for 30 seconds.
Problem: The sign looks crooked once hung
Solution: Measure from the ceiling or floor to the top corners of the piece and adjust until both measurements match. If using ribbon, adjust one side’s knot length rather than re-hanging the hardware.
What Success Looks Like
Your project is complete when: the quote is readable from at least eight feet away; letters are straight, evenly spaced, and securely attached; the background shows no drips or patchy paint; the piece hangs level in your intended location; and everything feels sturdy when handled. For painted lettering, run a dry finger lightly across a letter — no paint should transfer. Step back, view the decor in the room’s normal lighting, and confirm the overall effect: the quote should be the first thing you notice, with any decorations playing a supporting role.
Next Steps
Once your first piece is done, expand your decor set: make two or three matching signs in the same font and color scheme for a coordinated look on a mantel or entryway. Common companion quotes include “Witch Parking Only,” “Free Poison Apples,” and “Knock If You Dare.” Store flat in a dry location between seasons, wrapped in newspaper or bubble wrap to protect the lettering. If any painted letters scuff during storage, touch them up with your detail brush. If you enjoyed the painted stencil method, consider investing in reusable vinyl stencils or a cutting machine for faster, repeatable results next year.
Frequently Asked Questions
What are the best short quotes for Halloween decor?
Popular options that work well at 3-6 words include “Enter If You Dare,” “Something Wicked This Way Comes,” “Beware,” “Witch Way to the Candy,” “Resting Witch Face,” and “Free Broom Rides.” Shorter phrases read better from a distance, so save longer literary quotes for large signs displayed at eye level.
Can I use a Cricut or cutting machine instead of buying letters?
Yes. Cut your quote from adhesive vinyl, apply transfer tape over the cut letters, position the tape on your board using the same centerline method described above, and burnish firmly before peeling the tape away slowly. This replaces Method A and gives you custom fonts and exact sizing.
How do I make the decor weatherproof for outdoor use?
Use a wood base, apply lettering with paint or vinyl rather than paper, and seal both sides and all edges with two coats of clear acrylic sealer. Even sealed pieces should hang in covered areas only — direct rain will eventually damage any craft project.
What font styles look spooky without being hard to read?
Bold serif fonts, distressed typewriter styles, and heavy sans-serifs with wide spacing all read clearly while feeling atmospheric. Avoid ornate gothic scripts for small signs — the flourishes become unreadable at a distance. Test readability by printing your quote and viewing it from across the room before cutting or painting.
Can I make this project without any power tools?
Yes. Use a pre-cut canvas panel, wooden plaque, or cardboard as your base and a hole punch or pushed-through awl for hanging holes. Every method in this guide works with just scissors, glue, and paint.