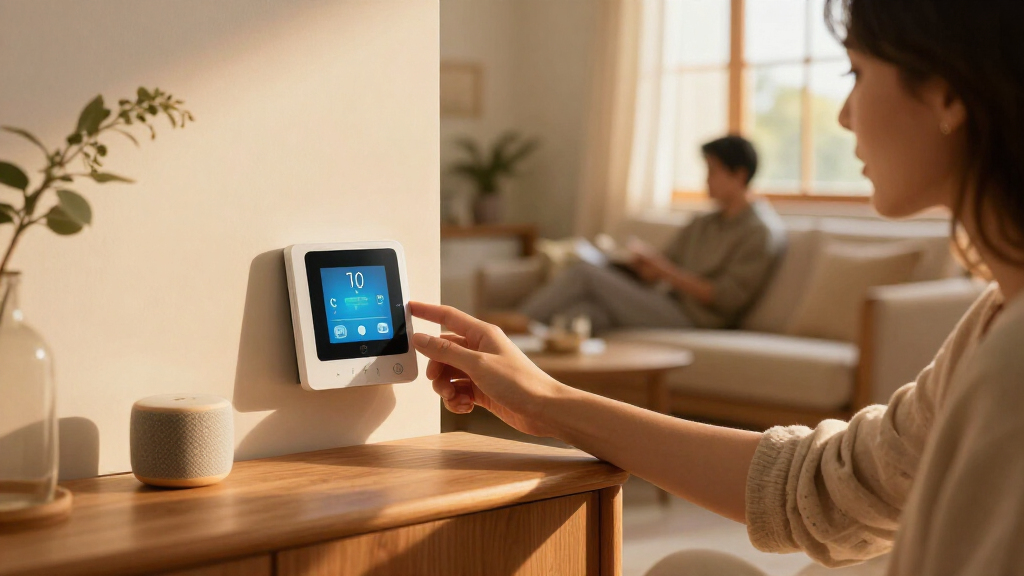
Set up a smart home device by connecting it to power, your home Wi-Fi, and its companion app, then checking its controls. This guide is for beginners setting up common devices such as smart bulbs, plugs, speakers, sensors, or thermostats. Allow 20-45 minutes for one device; a thermostat or multi-device hub may take longer.

Get the little things that make your day delivered free with Prime
- Fast, free delivery on millions of items
- Prime Video, Amazon Music and more included
- Member-only deals all year

Amazon Echo Show 15 (2nd Gen), 15.6" Full HD Smart Display with Fire TV and Alexa
- ✔ Display: 15.6-inch Full HD (1920 x 1080)
- ✔ Dimensions: 16.1 x 10.1 x 1.4 inches
- ✔ Weight: 4.96 lb
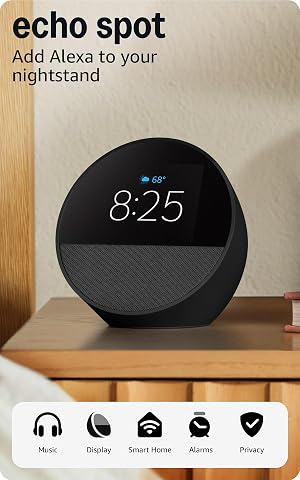
Amazon Echo Spot Smart Alarm Clock with Alexa (Black)
- ✔ Display: 2.83-inch touch screen, 240 x 320 pixels
- ✔ Dimensions: 4.5 x 4.1 x 4.4 inches
- ✔ Weight: 14.3 oz (405 g)

Sonos Era 100 Wireless Smart Speaker (White)
- ✔ Model: Sonos Era 100
- ✔ Connectivity: Wi-Fi, Bluetooth, USB and line-in via adapter
- ✔ Voice assistant: Amazon Alexa
Difficulty: Beginner | Time: 20-45 minutes per device
What You’ll Need
Tools & Materials:
- Smart home device and any included accessories
- Smartphone or tablet
- Device manufacturer’s companion app
- Home Wi-Fi name and password
- Power outlet or any tools listed in the device manual
Knowledge:
- Basic smartphone use
- Ability to join a Wi-Fi network
- Name of the room or area where the device will be used
Check the device manual for supported Wi-Fi bands, required hubs, power needs, and installation limits. Many devices use 2.4 GHz Wi-Fi; some require a hub or a specific smart home platform. For wired devices such as thermostats, turn off power at the circuit breaker and follow the manufacturer’s instructions. If wiring or compatibility is unclear, use a qualified installer.
Amazon Echo Show 15 (2nd Gen), 15.6" Full HD Smart Display with Fire TV and Alexa
The Echo Show 15 (2nd Gen) earns our top position by combining a visible home control center with entertainment and communication features. Its 15.6-inch Full HD screen gives household members room to see widgets and smart-home controls at a glance, while built-in Fire TV makes it useful even when nobody is adjusting devices. Compared with the Echo Spot, it is far more suited to shared spaces and visual information, but it also demands much more wall or counter space.Its hub support spans Zigbee, Matter and Thread, making it the most capable option here for connecting a wider mix of compatible devices. The 13 MP camera adds auto-framing and zoom for video calls, and a physical shutter plus mic-off button offer direct privacy controls. The compromise is scale: at nearly five pounds and over 16 inches wide, this is a fixture to plan around, not a display to casually move from room to room. It also lacks support for ad-hoc Wi-Fi networks.We rank it above the Era 100 because it can organize, show and control more of a household’s connected routines. The Sonos speaker is the more focused audio choice; the Show 15 makes sense when the screen itself is central to the smart-home setup.
Pros:
- Large Full HD screen supports portrait and landscape placement.
- Built-in hub supports Zigbee, Matter and Thread.
- Fire TV enables direct streaming without a separate player.
- Camera shutter and mic-off button provide physical privacy controls.
Cons:
- Large size requires a planned wall or counter location.
- Does not support ad-hoc Wi-Fi networks.
- Its camera and dashboard benefits matter less in rooms where nobody needs a shared screen.
Best for: Households that want a shared visual dashboard, compatible-device hub, streaming screen and video-call station in one fixed location.
Not ideal for: People with limited wall or counter space, or buyers seeking a portable speaker-first device.
Bottom line: Choose the Echo Show 15 when broad device compatibility and a shared visual control point matter more than compactness.
“Choose the Echo Show 15 when broad device compatibility and a shared visual control point matter more than compactness.”
Amazon Echo Spot Smart Alarm Clock with Alexa (Black)
The Echo Spot brings Alexa routines and basic smart-home interaction to a compact clock format. Its 2.83-inch touch screen can show the time, weather and song information, giving us a quick glanceable interface without taking over a nightstand. That makes it easier to place than the Echo Show 15, though its small display is not a substitute for a household dashboard or the Show’s larger video-call screen.A particular differentiator is eero Built-in, which can extend Wi-Fi coverage by up to 1,000 square feet when used with a compatible eero router and account linkage. That may make the Spot more useful in a network edge room, but it is not a universal benefit: homes without compatible eero equipment should treat it mainly as an alarm clock and voice assistant. Its single 1.73-inch speaker is suitable for bedside listening, while the Era 100 is the stronger option for listeners who care more about stereo presentation and fuller sound.The Spot’s physical mic-off button and recycled-material construction add thoughtful touches. Still, its modest screen and lack of a camera keep it firmly in the personal-assistant category. We place it second because it fits a common smart-home use case with little space, but it cannot manage a home as visibly or broadly as the Echo Show 15.
Pros:
- Compact format suits nightstands, offices and kitchen counters.
- Screen shows time, weather and song details at a glance.
- eero Built-in can extend compatible eero networks.
- Physical mic-off button and 36% recycled materials.
Cons:
- Wi-Fi extension requires a compatible eero router and account linkage.
- Small screen limits visual controls compared with the Echo Show 15.
- No camera and a single full-range speaker limit calls and stereo listening.
Best for: People who want an Alexa alarm clock for a nightstand or desk, especially those already using a compatible eero router.
Not ideal for: Buyers who need a large shared control panel, video calling, or stronger room-filling stereo sound.
Bottom line: Pick the Echo Spot for bedside convenience and compact Alexa access, especially if its eero extension works with your existing network.
“Pick the Echo Spot for bedside convenience and compact Alexa access, especially if its eero extension works with your existing network.”
Sonos Era 100 Wireless Smart Speaker (White)
Where the Echo Show 15 turns a wall into a control surface, the Sonos Era 100 focuses on sound. Its dual-tweeter architecture and larger midwoofer are designed to deliver stereo separation and deeper bass from a compact speaker, and Trueplay tuning adjusts the sound to the room. For buyers who want music to be the main smart-home experience, that specialization is a strength. It is not, however, a display or a broad device dashboard like the Show 15.Connectivity gives the Era 100 more flexibility for playback than a basic voice speaker: it supports Wi-Fi and Bluetooth, with line-in available through a separate adapter. That puts it ahead of the Echo Spot for sound-focused listening and lets it accommodate different sources, but the adapter requirement adds another piece to plan for. Alexa voice control connects it to routines and requests, although its primary role remains a multi-room speaker, not a dedicated smart-home hub.The compact cabinet can sit on a shelf or counter, but it needs corded power and is not water-resistant. Those limits make it less suitable for a bathroom, patio or anyone who wants portable listening. We rank it third for a general smart-home roundup because it combines fewer household functions than the screen-based Amazon options; for a room where audio matters most, it may be the right pick regardless of that ranking.
Pros:
- Dual tweeters and a larger midwoofer target detailed stereo sound and bass.
- Trueplay tuning adjusts EQ to room acoustics.
- Wi-Fi and Bluetooth support flexible streaming.
- Compact shape fits shelves, counters and nightstands.
Cons:
- Line-in requires a separate adapter.
- Corded power means it is not portable.
- Not water-resistant, limiting placement options.
Best for: Listeners who want a compact, Alexa-enabled speaker with room tuning and multiple playback connections.
Not ideal for: People seeking a visual smart-home dashboard, battery portability, or a speaker for wet or outdoor locations.
Bottom line: Choose the Era 100 when music quality and room-aware tuning matter more than a screen or broad smart-device control.
“Choose the Era 100 when music quality and room-aware tuning matter more than a screen or broad smart-device control.”
As an Amazon Associate we earn from qualifying purchases.
Before You Start
Choose a location with reliable Wi-Fi and access to the power source the device requires. Keep the device, phone, and router within range during setup. Download the official app from your phone’s app store, and check that Bluetooth and location access are available if the app requests them for discovery. Do not share your Wi-Fi password or account verification codes with anyone.
Step-by-Step Instructions
Step 1: Check compatibility and placement
Read the device label or manual and confirm it works with your Wi-Fi band, phone, and any smart home platform you plan to use. Check whether it needs a hub, bridge, or separate controller. Choose its final location, and confirm that the signal reaches that spot before mounting or plugging it in.
Tip: For a device that will be installed out of reach, complete app setup and a basic test before attaching it permanently.
Check: The device’s requirements match your network and equipment, and the planned location has power and a usable network signal.
Step 2: Install the companion app
Find the manufacturer’s official app in your phone’s app store and install it. Open the app, create an account or sign in, and grant only the permissions needed for setup and operation. Use a unique password for the account and turn on multifactor authentication if it is available.
Tip: Check the app publisher before installing it; similarly named apps may be unrelated.
Check: You can sign in and see the app’s device setup or add-device option.
Step 3: Power the device
Follow the manual to insert batteries, connect the supplied adapter, plug in the device, or complete its installation. For a bulb or plug, use a compatible fixture or outlet. For wired equipment, follow its safety instructions and do not guess at wire connections. Wait for the status light or screen to show that the device is ready for setup.
Tip: A blinking light often means pairing mode, but its meaning varies. Check the manual before resetting or pressing and holding a button.
Check: The device powers on and shows the startup or pairing indicator described in its manual.
Step 4: Add the device in the app
In the companion app, choose the option to add or set up a device. Select the correct product type, then follow the prompts to scan a QR code, enter a setup code, or let the app search nearby. Keep your phone close to the device while it pairs.
Tip: If the app asks you to join a temporary device network, follow the prompt and return to the app afterward.
Check: The app identifies the device and advances to network setup or device naming.
Step 5: Connect it to Wi-Fi
Select your home network and enter its password carefully. If the device requires 2.4 GHz Wi-Fi, choose that network rather than a 5 GHz-only network. Keep the phone and device near the router until setup finishes. Wait for the app to confirm the connection before closing it.
Tip: A guest network, captive portal, or network with device isolation may prevent smart devices from connecting or communicating with one another.
Check: The app reports that setup is complete, and the device appears as online or connected.
Step 6: Name and organize the device
Give the device a short, recognizable name, such as “Kitchen lamp” or “Hallway sensor,” and assign it to the correct room in the app. Use names that are easy to say if you plan to control devices with voice commands. Avoid assigning several devices the same name.
Tip: You can usually change the name and room later in the device settings.
Check: The device appears in the intended room with a name you can identify quickly.
Step 7: Test its basic controls
Use the app to operate the device. Switch a bulb or plug on and off, change a speaker’s volume, or check that a sensor reports a change. If the device has a physical control, try that too. Confirm that the app updates to reflect the device’s current state.
Tip: For a thermostat or other device that affects heating, cooling, water, or security, test only the controls described in its manual.
Check: The device responds to a basic command, and its reported state matches what you can see or hear.
Step 8: Link a platform or create an automation if needed
Open your voice assistant or smart home platform app, then add or link the manufacturer’s service if you use that platform. Sign in through the official linking prompt and confirm that the device appears there. To create an automation, set one simple trigger and one action, such as turning on a light at sunset, then save it.
Tip: Some devices do not support every platform or automation feature. Check the product’s compatibility list before troubleshooting a missing option.
Check: The platform can control the device, or the saved automation runs when its trigger occurs.
Common Mistakes to Avoid
- Choosing a Wi-Fi band the device does not support. — Check the manual before setup and connect to the required band, often 2.4 GHz.
- Putting the device in a location with weak signal. — Test the connection near the intended location before mounting the device.
- Using a vague or repeated device name. — Give each device a distinct name based on its room and function.
- Resetting the device before checking the setup instructions. — Read the status-light guide first; a factory reset can erase settings and require setup from the beginning.
Troubleshooting
Problem: The app cannot find the device.
Solution: Move the phone closer, confirm the device is powered, and check that it is in pairing mode. Turn on Bluetooth if the app requests it. Restart the app and follow the manual’s pairing steps.
Problem: Wi-Fi setup fails or the device goes offline.
Solution: Re-enter the network password, confirm the required Wi-Fi band, and move the device closer to the router. Check whether the network uses a captive portal or blocks communication between devices.
Problem: The device appears in the app but does not respond.
Solution: Check its power source and physical switch, then refresh the app. Restart the device using the manual’s procedure. If it remains offline, check the router connection and the manufacturer’s service status.
Problem: A voice assistant or automation cannot control it.
Solution: Confirm that the device supports the platform, link the correct manufacturer account, and refresh the device list. Check the device name and automation trigger, then run a simple manual command in the platform app.
What Success Looks Like
The device remains online in its companion app, responds to a basic control, and shows the correct state. If you linked a voice assistant or created an automation, that feature can also find and operate the device as intended.
Next Steps
Keep the app and device firmware current, review account security settings, and check the manufacturer’s guidance before changing network equipment. If you move the device or replace your router, update its network settings through the app. Add further devices one at a time and test each before building larger automations.
Frequently Asked Questions
Do all smart home devices need Wi-Fi?
No. Some connect through Bluetooth, Zigbee, Thread, or a dedicated hub. Check the product requirements and confirm you have any needed hub before setup.
Why does a device require 2.4 GHz Wi-Fi?
Many devices use 2.4 GHz radios because they can work well across rooms and use less power. The device manual lists supported bands; follow that specification during pairing.
Can I set up several devices at once?
You can, but setting them up one at a time makes connection issues easier to identify. Give each device a distinct name and test it before adding the next.
What should I do before replacing my router?
Check whether your new router can use the same Wi-Fi name and password. Some devices reconnect automatically when those details stay the same; others require you to update the network in their app or pair them again.
Is it safe to install a smart thermostat myself?
Only install it yourself if the manufacturer says your wiring and system are compatible and you can follow the wiring instructions. Turn off power at the breaker first. Contact a qualified installer if wires, voltage, or compatibility are uncertain.